
Plaster walls can add a touch of elegance and charm to any home, but they are not without their issues. From cracks and holes to peeling paint and water damage, plaster walls can require some maintenance to keep them looking their best.
We will discuss some common problems with plaster walls and provide step-by-step instructions on how to fix them. If you're dealing with cracks, holes, loose plaster, water damage, or peeling paint on your walls, keep reading to learn how to tackle these issues and restore your walls to their former glory.

Contents
Plaster walls are constructed by applying several layers of plaster over lath, which can be made of wood or metal, creating a smooth and durable surface that has been used in construction for centuries. These walls typically require a bonding agent such as PVA bonding to ensure the plaster adheres properly.
Dig deeper: What Tools Does A Plasterer Need
Plaster walls, whilst durable, can face several common problems over time, such as cracks, holes, loose plaster, water damage, and peeling paint, which can affect both the aesthetic and structural integrity of the wall.
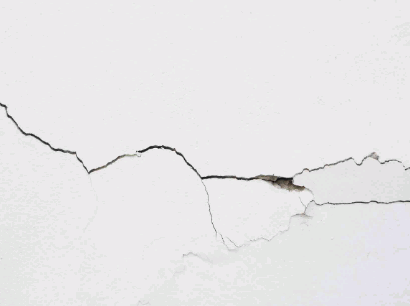
Cracks in plaster walls often occur due to the settling of the building or temperature fluctuations that cause the base coat to expand and contract.
There are two main types of cracks that can be observed in plaster walls - hairline cracks and structural cracks. Hairline cracks are superficial and usually caused by minor movements in the building, while structural cracks are deeper and can signify more serious structural issues.
The causes of these cracks can range from foundation problems to poor-quality materials. If left unrepaired, cracks in plaster walls can lead to water damage, mould growth, and even compromise the overall stability of the structure. It is essential to address these cracks promptly to prevent further deterioration and maintain the integrity of the building.
Base coat plays a crucial role in the occurrence of cracks as it provides the foundation for the plaster layers. Any deficiencies or defects in the base coat can result in weak points that are susceptible to cracking. Therefore, ensuring a proper base coat application is vital in preventing cracks in plaster walls.
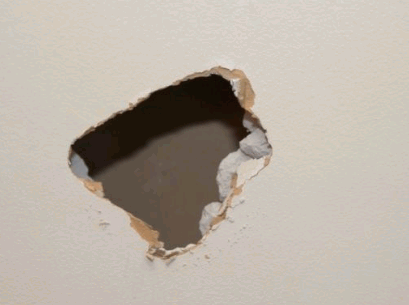
Holes in plaster walls can happen from impacts or damage to the lath beneath the plaster, which creates gaps that require patching.
When an object like a doorknob accidentally hits the wall or there are structural issues causing stress, it can lead to these holes. Over time, these holes can become larger due to expansion and contraction in the wall’s materials.
It's crucial to address these holes promptly, not only for aesthetic reasons but also to prevent further damage and maintain the structural integrity of the wall. By not patching them correctly, moisture and pests can infiltrate, exacerbating the problem.
The lath, a fundamental component of traditional plaster walls, provides support and a base for the plaster to adhere to. Without a sound lath system, the plaster is prone to cracking and falling apart over time.
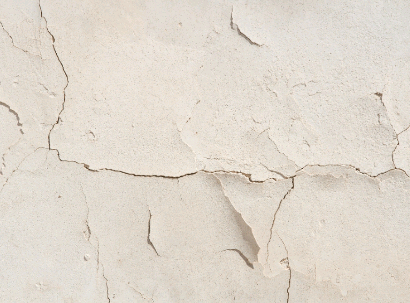
Flaky plaster can be a result of poor adhesion between the coat layers or failure of the bonding agent, causing sections of the plaster to detach from the wall.
When the bonding agent fails to adhere properly, it can lead to a weak foundation for the subsequent layers of plaster, resulting in delamination. This lack of cohesion can also be exacerbated by environmental factors such as humidity, temperature fluctuations, or structural movements. Signs of loose plaster may include visible cracks, bulging or sagging sections, or even chunks of plaster falling off the wall. To prevent and address these issues, using quality bonding agents and applying multiple coats of plaster with proper techniques are essential to ensure a durable and long-lasting finish.
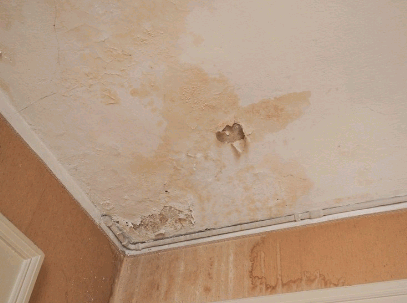
Water damage in plaster walls is often caused by leaks from pipes, radiators, or roof issues, leading to stains, weakening, and crumbling of the plaster material.
When water infiltrates the plaster walls through these leaks, it causes a gradual deterioration of the structure over time. The moisture seeps into the porous material, causing it to lose its integrity and strength, which results in unsightly stains and discoloration on the surface. In severe cases, the plaster can start to crumble and disintegrate, posing safety hazards and aesthetic concerns.
Common sources of leaks that lead to water damage in plaster walls include faulty plumbing systems, leaking radiators, roof leaks, and condensation build-up. These issues can go unnoticed for long periods, exacerbating the damage and necessitating costly repairs.
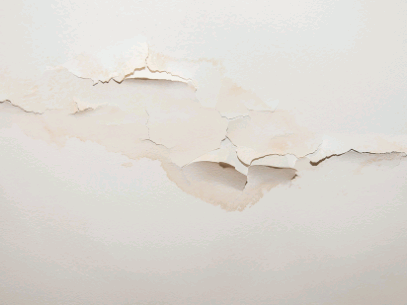
Peeling paint on plaster walls can result from moisture, improper surface preparation, or the lack of a latex bonding agent, causing the paint to lose adhesion.
Moisture is a common culprit in causing paint to peel on walls as it can seep through cracks or poorly sealed surfaces, leading to a breakdown of the paint layers. Improper surface preparation, such as failing to clean or prime the surface adequately, can also prevent the paint from adhering properly, resulting in flaking or peeling. Incorporating a latex bonding agent in the paint can significantly enhance adhesion by creating a strong bond between the surface and the paint, effectively reducing the likelihood of peeling paint issues.
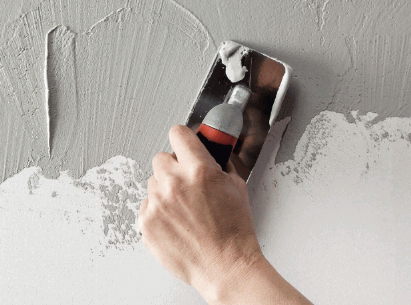
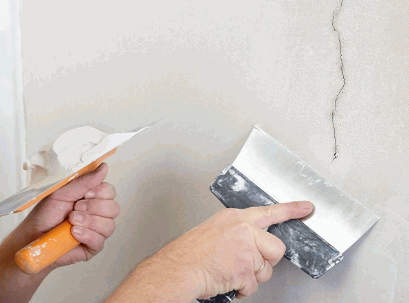
Fixing cracks in plaster walls involves a series of steps to ensure the surface is properly prepared, filled, and smoothed to restore the wall's appearance and integrity.
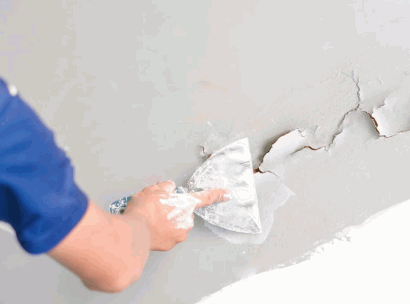
Begin by cleaning and preparing the area around the crack to remove any loose plaster, dust, or debris, ensuring a clean surface for the repair.
Having a pristine surface is crucial as it allows the repair materials to adhere properly, ensuring a long-lasting solution. To clean the area effectively, you can use a soft brush or a vacuum cleaner to remove any loose particles. Once the visible debris is cleared, a damp cloth can be used to wipe down the area and make sure it is free from any remaining dust.
Remember, proper cleaning and preparation pave the way for a successful and seamless repair job, enhancing the durability of the repaired surface.
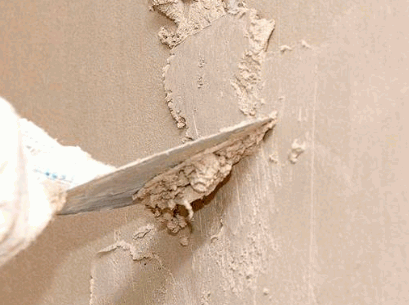
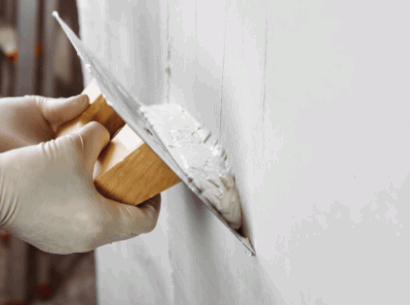
Next, fill the crack with a joint compound using a filling knife, ensuring the compound is pressed firmly into the crack to create a solid repair.
It's crucial to apply the joint compound smoothly and evenly along the entire length of the crack.
Work in small sections to prevent the compound from drying out too quickly. Once the crack is filled, scrape off any excess compound using the filling knife in a smooth, even motion. This will ensure a level surface for painting or further repairs.
Different types of tools can be used for this task, ranging from standard filling knives to specialised joint compound spatulas designed for seamless application. Remember to clean the tools thoroughly after each use to maintain their effectiveness for future projects.
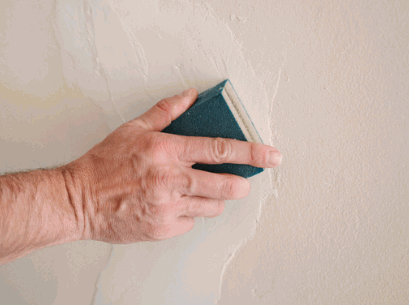
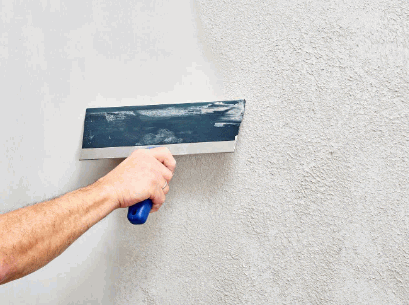
After the joint compound has dried, sand and smooth the surface to blend the repair with the surrounding wall, creating an even finish.
Regarding sanding, selecting the right sandpaper grit is crucial for achieving a seamless finish. Sandpaper comes in various grit sizes ranging from coarse to fine. Coarse grits like 60-80 are great for heavy material removal, while medium grits like 100-150 are ideal for smoothing surfaces. Fine grits like 180-220 are used for the final finishing touches. To ensure a smooth result, start with coarser grits and gradually move to finer ones.
Techniques such as sanding in circular motions or in the direction of the grain can make a significant difference in the final outcome. Using a sanding block or a sanding sponge can provide better control and even pressure, preventing over-sanding in certain areas.
Fixing holes in plaster walls requires specific steps to clean, fill, and smooth the damaged area, ensuring that the repair blends seamlessly with the existing wall surface.
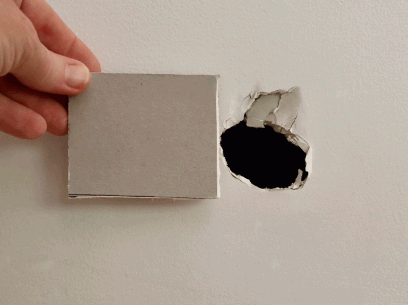
Next, fill the hole with patching compound, using a putty knife to press the compound firmly and evenly into the hole to create a smooth patch.
Once the patching compound is applied, it's crucial to allow it to dry completely before proceeding to the next step. This typically takes around 24 hours, but it's advisable to follow the manufacturer's instructions for specific drying times.
After the compound has dried, sand the patched area gently with fine-grade sandpaper to smooth out any rough edges and ensure a seamless blend with the surrounding wall. This step is essential for achieving a professional finish.
Once the patched area is smooth and dry, you can proceed with painting to match the rest of the wall. Be sure to use a high-quality paintbrush or roller for even coverage and a visually cohesive result.
Fixing loose plaster on walls involves:
Start by carefully removing the loose plaster from the wall, ensuring not damage the underlying lath or structure.
Once the loose plaster has been removed, it is essential to prepare the surface for repair. This involves cleaning the area thoroughly to remove any remaining debris and dust. A wire brush or scraper can be useful in this step to ensure a clean surface for the next phase.
Repairing plaster walls will require specific tools such as a putty knife, joint compound, sandpaper, and a trowel. Before applying any new plaster or compounds, it is advisable to wear protective gear such as goggles and a dust mask to prevent inhaling any harmful particles.
Next, apply plaster washers to the wall, screwing them into place to secure the remaining plaster and prevent further loosening.
Plaster washers are small discs made of durable material, typically metal or plastic, that are designed to reinforce and stabilise sections of plaster that have begun to crack or separate from the underlying surface. They are incredibly useful in preventing the need for complete plaster replacement by providing support to the existing material.
To apply plaster washers, start by identifying areas of concern on the wall where the plaster is showing signs of weakness. Then, simply place the washer over the problem spot and use screws to firmly attach it to the wall. These washers effectively distribute the weight and stress, helping to maintain the integrity of the plaster and prevent future damage.
After securing the plaster, patch the area and smooth the surface to blend the repair with the surrounding wall, creating a seamless finish.
When patching the area, you'll need a few essential tools to achieve a professional finish. These tools typically include a filling knife, glasspaper, plasterboard jointing compound, and a paintbrush. The filling knife is used for applying and smoothing the compound, while the glasspaper helps in levelling and smoothing out any rough edges. The plasterboard jointing compound is crucial for filling in the patched areas and creating a flush surface. A paintbrush is handy for blending the repaired section with the rest of the wall seamlessly.
Fixing water-damaged plaster walls involves:
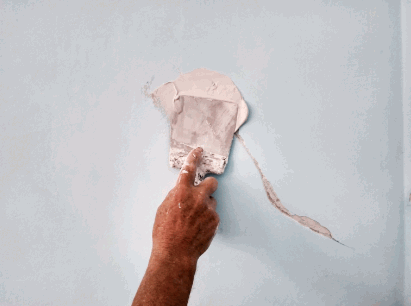
Once the source of the water damage has been repaired, carefully remove the damaged plaster from the wall, ensuring all weakened material is cleared away.
To begin the removal process, you will need a few essential tools such as a utility knife, a pry bar, and a putty knife. These tools will help you efficiently extract the damaged plaster without causing further harm to the surrounding area. It's vital to wear protective gear like gloves, goggles, and a mask to prevent any potential health hazards from exposure to dust and debris.
After removing the damaged plaster, repair and patch the wall by applying a new layer of plaster or patching compound, ensuring a smooth and even surface.
Once the damaged area is prepped and ready for repair, it's essential to gather the necessary tools for the job. Common tools used for plaster repair include a trowel, putty knife, hawk, sandpaper, and a sponge.
The first step involves mixing the plaster or patching compound according to the manufacturer's instructions, ensuring a workable consistency.
Next, apply the mixture to the affected area using the trowel or putty knife, spreading it evenly to create a seamless finish. It's crucial to feather out the edges of the patch to blend it seamlessly with the surrounding surface.
Repairing peeling paint on plaster walls involves:
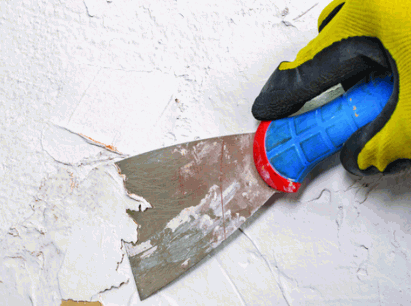
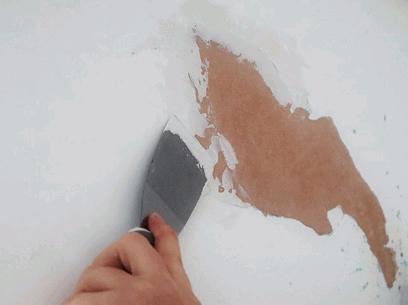
Begin by scraping off the peeling paint from the wall, ensuring all loose and flaking paint is removed to create a clean surface for repainting.
To effectively scrape off the peeling paint, you will need a few essential tools in your armoury. These typically include a scraper, putty knife, sandpaper, and a stiff brush. The scraper is ideal for larger areas, while the putty knife comes in useful for more intricate spots. Sandpaper can help smooth out rough patches, and the brush will help remove any remaining dust. Using a combination of these tools will ensure thorough removal of the old paint, preparing the surface for a fresh coat.
After scraping off the peeling paint, sand and smooth the surface to prepare it for priming and repainting, ensuring an even and clean finish.
Prime and repaint the wall to cover the repaired surface, using a high-quality primer and paint to ensure a long-lasting and professional finish.
Priming the wall before painting is essential as it helps create a smooth surface for the paint to adhere to, ensuring better durability and a more even finish. There are different types of primers available, such as oil-based or water-based primers, each suitable for specific surfaces and conditions.
Regarding choosing the right paint, opt for a durable and high-quality option that matches the primer used. This will enhance the longevity of the paint job.
To achieve a flawless coat, make sure to apply the primer and paint in thin, even layers, allowing each coat to dry completely before adding the next. Sanding between coats can also help smooth out any imperfections.
