Are you looking to upgrade your lighting without breaking the bank? An LED Retrofit Kit, featuring modern lighting technology, could be the perfect solution.
This article explores what an LED Retrofit Kit is and highlights the many benefits it offers, including energy efficiency, cost savings, and improved lighting quality, making it a smart choice for anyone looking to enhance their lighting solution.
It will guide you through the installation process step-by-step, provide essential tips for success, share common mistakes to avoid, and discuss how to integrate smart control options.
Dive in and discover how to enhance your space with this smart lighting upgrade, improving both aesthetic appeal and energy usage!
Contents
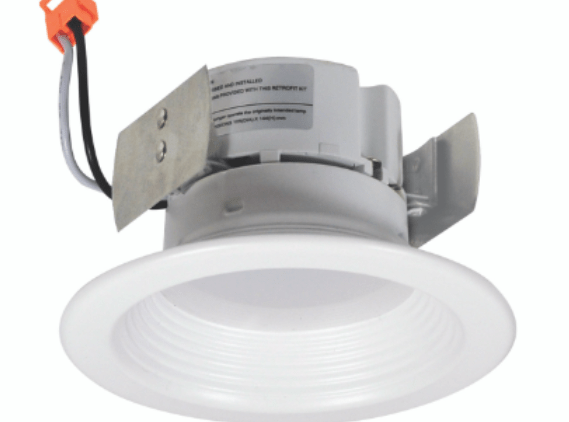
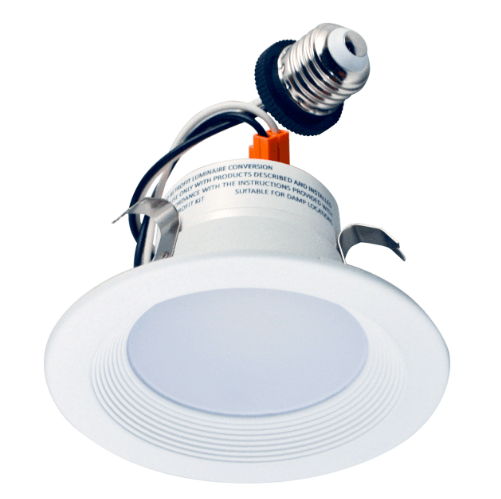
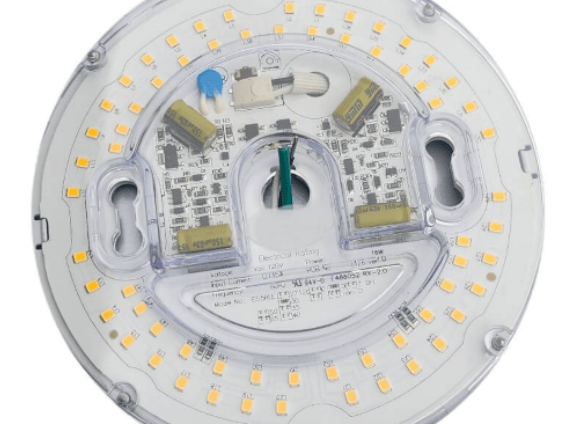
An LED Retrofit Kit is a lighting solution designed to upgrade existing fittings by replacing traditional lighting with energy-efficient LED technology, offering a significant improvement in both brightness levels and longevity, ensuring cost-effective and efficient lighting.
With a versatile design, these kits can fit various fitting types—whether in homes, offices, or commercial spaces—and are compatible with many traditional bulb sockets, including E27 adapters, E26 adapters, and TP24 connectors.
This retrofit not only enhances lighting performance but also aligns with environmental sustainability goals, providing long-term savings on energy bills and maintenance costs, and reducing lighting expenses over time.
Considering an LED Retrofit Kit can lead to substantial cost savings and energy efficiency, making it a smart choice for both residential and commercial spaces. By replacing incandescent bulbs with energy-efficient LED bulbs, users can immediately notice a reduction in energy consumption and lower energy bills, achieving significant savings on energy costs.
Additionally, the improved lighting quality and reduced maintenance costs associated with longer-lasting LED technology are compelling reasons to make the switch, especially for a retail chain aiming to enhance its lighting fixtures.
Discover: What Are The Advantages Of LED Lighting
Energy efficiency is one of the most significant benefits of using an LED Retrofit Kit, as these lighting solutions consume substantially less energy compared to traditional incandescent bulbs, thus reducing overall energy consumption in homes and commercial spaces, aligning with the U.S. Department of Energy guidelines.
This reduction is particularly noteworthy, as it has been shown that LED lights often use up to 75% less energy, making them a superior choice for anyone looking to enhance their energy savings. When considering that energy-efficient lighting can last up to 25 times longer than conventional options, the financial savings on replacement costs and energy bills accumulate rapidly, offering long-term savings and reduced maintenance efforts.
By choosing retrofitting solutions, not only do individuals and businesses optimise their lighting systems, but they also contribute positively to the environment through lower electricity demand and decreased carbon footprints.
The installation of an LED Retrofit Kit can result in significant cost savings over time, primarily through lower energy bills and decreased maintenance costs associated with the longevity of LED technology, minimising maintenance efforts and lighting expenses.
By utilising LED technology, businesses and homeowners can experience a substantial reduction in their energy costs, often falling between 50% and 80% compared to traditional lighting methods. For example, if a facility spends £1,000 annually on lighting, switching to an LED Retrofit Kit could reduce that cost to as low as £200-£500 annually. This translates to a potential saving of £500 to £800 each year.
LEDs have a longer lifespan, typically lasting up to 25,000 hours, whereas incandescent bulbs usually fade after about 1,000 hours. This durability not only minimises the frequency of replacements but also lowers maintenance costs associated with bulb changes, which can involve labour expenses and disposal fees. In many cases, the total savings over the lifespan of the LED Retrofit Kit can easily exceed thousands of pounds, making it a cost-effective investment.
One of the standout features of LED Retrofit Kits is their longevity; LED bulbs can last up to 25,000 hours or more, drastically reducing maintenance expenses and the frequency of bulb replacements in various lighting fixtures, ensuring secure connections and reliability.
This remarkable lifespan is significantly greater than that of traditional incandescent or fluorescent options, which usually last between 1,000 and 15,000 hours, providing significant savings on lighting expenses.
Switching to LED technology not only extends the interval between replacements but also minimises the labour costs associated with frequent bulb changes. The durability of LEDs makes them less prone to breakage and failure, providing a reliable lighting solution for both residential and commercial spaces, enhancing compatibility with existing fixtures.
By investing in LED bulbs, one ensures a dependable source of illumination that can withstand the test of time, simultaneously benefiting the environment through lower energy consumption.
Improved lighting quality is another major advantage of LED Retrofit Kits, as they offer superior brightness levels and can enhance ambient lighting, contributing to a more aesthetically pleasing environment in both residential and commercial spaces.
The transformative impact of these kits is particularly significant when considering factors such as colour temperature, which allows users to create an inviting atmosphere tailored to specific needs and preferences. For instance, warm white tones can evoke a cosy feel in living areas, while cooler temperatures might be ideal for workspaces needing focus.
The enhanced lighting performance greatly enriches user experience, making these kits a wise investment for any setting, offering both cost savings and aesthetic appeal.
Installing an LED Retrofit Kit involves a straightforward installation process that can be accomplished with a few essential tools and a step-by-step approach, ensuring secure connections for optimal lighting performance. Proper adherence to safety guidelines is crucial to prevent electrical hazards during the installation, enhancing electrical safety.
Tools required typically include:
These tools will help ensure that the retrofit is done safely and efficiently.
The first step in the installation process is to gather all necessary materials, including the LED Retrofit Kit, wiring components, and essential tools such as wire cutters, a voltage tester, and safety equipment to ensure a secure and safe installation, following instructional guides for best practices.
This crucial preparatory phase lays the foundation for a successful outcome. When one takes the time to collect everything needed, it minimises disruptions that can arise during the installation.
Consider the following comprehensive list of tools and their purposes:
By determining all necessary items ahead of time, one can tackle the project with confidence and efficiency.
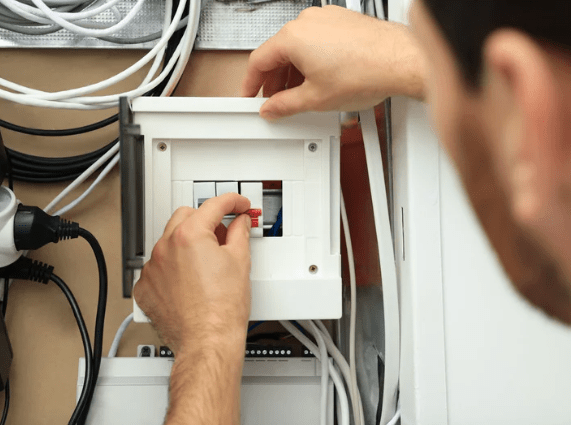
Before beginning the installation, it is essential to turn off the power at the circuit breaker to ensure electrical safety; using a voltage tester can help confirm that the power is indeed off before proceeding with any wiring components, ensuring safe handling of electrical components.
Plus turning off the circuit breaker, it is vital to take a few additional precautions to guarantee a safe working environment. After cutting the power, it is advisable to double-check with a voltage tester to verify that there are no live wires present. This step is crucial for preventing electric shocks that could lead to serious injuries. Secure connections must be established for effective and reliable performance.
In essence, these safety measures support a smooth installation process and safeguard the well-being of those involved.
The next step involves carefully removing existing fittings, ensuring that all wiring components are properly disconnected and that the necessary tools, such as a Phillips screwdriver, are within reach to facilitate a smooth transition and make it user-friendly.
During this phase, it's crucial to approach the task with caution to avoid any electrical hazards. Begin by turning off the power supply to the fittings at the circuit breaker, verifying that the electricity is off with a voltage tester. This ensures safety while handling wiring components.
It's not uncommon to encounter challenges such as rusted screws or tight spaces, which may require additional tools like pliers or a socket spanner. In those instances, maintaining a steady hand will help avoid unnecessary damage. Remember, the goal is to remove the fittings cleanly while keeping the area organized. Following these best practices will allow for a more efficient installation of the new components.
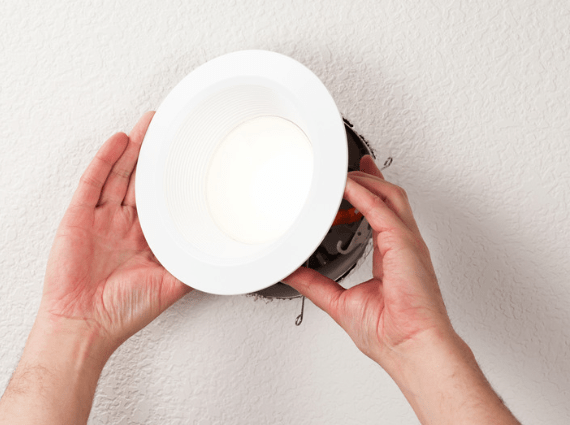
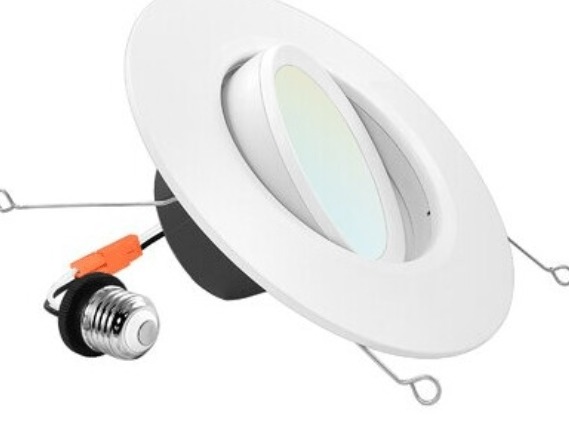
Once the existing fittings are removed, the next step is to install the LED Retrofit Kit, ensuring that all secure connections are made according to the specific compatibility of your fitting types, such as using an E26 adapter or TP24 connector as required, especially when replacing bulbs with LED bulbs.
During this transition, it is crucial to pay close attention to the compatibility of the LED Retrofit Kit with your existing lighting system. Each type of fitting, including recessed LED and various fixture types, may require different adapters or connectors to establish effective electrical contact, thus maintaining optimal performance. Verify the wattage and voltage specifications to prevent potential hazards or damage.
Here’s a quick checklist:
By carefully aligning these components, you can ensure a smooth and efficient installation process.
Connecting the wiring is a crucial step in the installation of an LED Retrofit Kit, requiring attention to detail to ensure that all wiring components are securely connected and in adherence to electrical safety guidelines.
When undertaking this process, it’s important to assess the environment and the specific components involved. Properly connecting wires not only enhances functionality but also reduces the risk of electrical hazards.
Check the wire types—whether they are twisted pair, sheathed, or stranded—and ensure that they are compatible with the LED system being installed. Adhering to safety protocols such as turning off the power supply and using appropriate insulation techniques cannot be overstated.
By prioritising these measures, the integrity of the wiring system will be upheld, promoting safety and efficiency in the overall electrical installation.
After all connections are made, it is time to test and adjust the lighting to ensure optimal brightness levels and functionality, following safety guidelines to verify that everything operates correctly.
During this crucial phase, each fitting should be visually inspected to ensure consistent illumination. To achieve the best results, here are some steps to take:
By following these steps, not only will the newly installed kit meet your lighting expectations, but you will also ensure safety and reliability long-term.
For a successful LED Retrofit Kit installation, consider following several tips that can enhance the process, such as carefully choosing the right kit for your specific needs and always adhering to safety precautions throughout the installation.
Choosing the right LED Retrofit Kit for your needs involves understanding the compatibility with different fitting types and ensuring that the kit meets your specific lighting goals and requirements.
To begin this process effectively, it’s vital to assess the existing fittings in your space and comprehend their specifications, such as size, shape, and lighting technology. This understanding will dictate the options available to you and avoid potential mismatches that could impede installation. Consider the desired lighting outcome—whether it’s bright, ambient, or task lighting.
By carefully weighing these factors, you can confidently select a retrofit kit that not only fits well within your existing system but also enhances the overall lighting environment to match your preferences.
Always following safety precautions is essential for a successful installation, including using the correct tools required and ensuring secure connections to prevent any electrical hazards.
Plus the basics, an individual should always wear protective gear, such as insulated gloves and safety goggles, to shield oneself from unexpected shocks or falling debris. Precautionary measures should be taken before beginning the installation process by ensuring the power supply is turned off at the main source, as this can prevent dangerous accidents.
Utilising tools like voltage testers and circuit testers can greatly enhance safety, confirming that wires are not live before handling.
By adopting these safety measures, anyone engaged in electrical installations can significantly reduce the likelihood of mishaps, creating a secure environment for both themselves and others.
If you feel uncertain about the installation process, consider hiring a professional who has the expertise and experience to ensure a successful installation while adhering to all safety guidelines. Consulting the U.S. Department of Energy for guidelines on modern lighting technology could also be beneficial.
Regarding retrofitting your lighting system, many advantages accompany the decision to enlist a professional's services. These experts are well-versed in the intricacies of LED Retrofit Kits, ensuring that every component is correctly integrated for optimal performance. Their knowledge encompasses not only installation but also compliance with local electrical codes, which is essential for enhancing safety and reducing potential hazards.
Hiring a professional isn't just about knowing the installation process—it's about safeguarding your investment and ensuring the system functions efficiently for years to come.
The potential cost savings of using an LED Retrofit Kit are significant, as these kits not only reduce energy bills through improved energy efficiency but also lower maintenance costs due to the longevity of LED technology.
While installing an LED Retrofit Kit can be straightforward, several common mistakes can undermine the installation process, such as neglecting to follow safety guidelines or failing to ensure secure connections between wiring components.